

When a fully automatic rebar threading machine suddenly stops feeding, it can slow down processing efficiency—or even delay the entire project. Most of these issues are caused by a combination of minor faults. With a systematic troubleshooting approach, you can identify the root cause within 10 minutes and avoid unnecessary disassembly.
Four Core Fault Sources for Accurate Diagnosis
1. Rolling System Issues (“Teeth” Problems Affect Feeding)
- Wrong rotation direction: The forward/reverse switch of the rolling head is incorrectly set, conflicting with the rebar feeding direction
- Specification mismatch: Rolling dies or positioning sleeves do not match the rebar diameter (e.g., Φ25 dies used for Φ20 rebar)
- Component wear: Die wear exceeding 0.3 mm or cracked positioning sleeves disrupt thread formation
2. Power System Issues (“Weak Heart” Can’t Drive Properly)
- Phase loss: Missing one phase in three-phase power reduces motor torque (check if all indicator lights are on)
- Poor electrical contact: Tripped thermal protector not reset, oxidized terminals causing unstable current
- Motor failure: Lack of lubrication in bearings or damaged coils (abnormal noise or slow speed during startup)
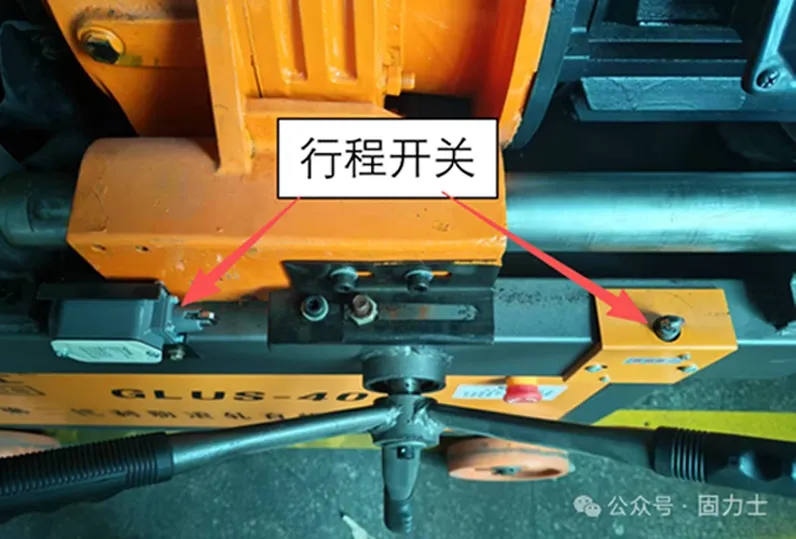
- Limit switch failure: Faulty or damaged limit switch can prevent the motor from operating
3. Adjustment Errors (Millimeter Deviations Cause Jamming)
- Incorrect shim placement: Wrong order of shims leads to uneven axial pressure
- Incorrect center height: Deviation >0.5 mm between rebar and rolling dies causes misalignment and blockage
- Feed resistance: Lack of lubrication in lead screw nut or worn guide rails increases manual feeding resistance
4. Material Defects (Problems at the Source)
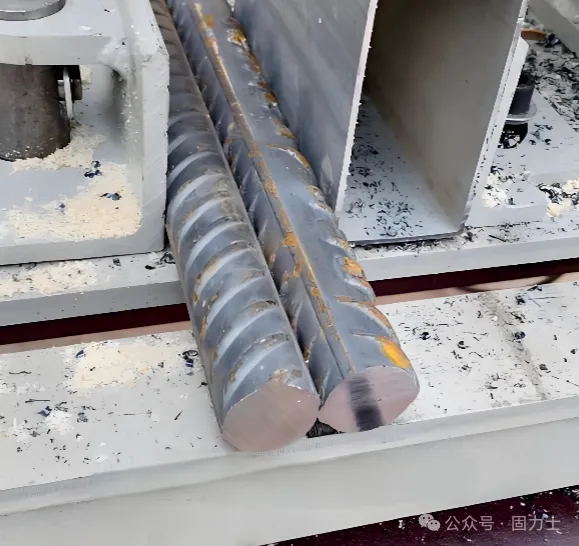
- Poor end preparation: Uneven cut (verticality >2°) or burrs prevent proper feeding
- Dirty surface: Oil, rust, or debris causes slipping between rollers and rebar
Over-spec processing: Attempting to process rebar beyond machine capacity (e.g., Φ32 machine processing Φ36)
5-Step Troubleshooting Method (Fast and Efficient)
Step 1: Quick Initial Check
- Check control box: all power indicators on, thermal protector not tripped
- Test manual feed (power off): ensure smooth operation
- Inspect rebar: clean cut, no burrs or rust
Step 2: Machine Head Inspection
- Confirm rolling dies match rebar specifications
- Check rotation direction matches arrow markings
- Disassemble head to inspect positioning sleeve order and die wear
Step 3: Electrical Diagnosis
- Measure voltage: ensure balanced three-phase supply (single phase 220V ±10%)
- Check circuits: test start button and relay continuity
- Test motor: runs fine no-load but weak under load → motor needs repair
- Test limit switch: manually trigger twice and confirm consistent response
Step 4: Precision Calibration
- Adjust center height: deviation ≤0.2 mm
- Reinstall shims correctly and tighten nuts for proper roller contact
- Apply lubrication: use high-temperature lithium grease on lead screw and guide rails, cycle feed 5 times
Step 5: Material Pre-Treatment
- Standardize cutting: use cold saw, flatness error ≤1 mm (no gas cutting)
- Clean surface: remove debris with wire brush, clean oil with acetone
First-piece inspection: process one sample per batch and verify with ring gauge and go/no-go gauge
3 Maintenance Tips to Prevent Recurrence
1. Routine Maintenance
- Clean metal chips and wipe guide rails every shift
- Lubricate lead screws and bearings weekly
- Tighten bolts and test emergency stop switch monthly
2. Wear Part Replacement
- Rolling dies: replace after 800–1000 uses
- Positioning sleeves: replace every 6–12 months
- Relays: replace after ~200,000 cycles
3. Proper Operation
- Do not exceed machine capacity
- Use 5–8% emulsion coolant
- Retract the tool before powering off
Summary
Failure to feed is usually a combined issue involving mechanical, electrical, and material factors. By following the workflow of
“Initial Check → Inspection → Calibration → Pre-treatment → Maintenance,”
you can quickly resolve faults and minimize future issues.
👉 Key insight: 70% of failures are caused by improper operation and maintenance. Mastering these methods is far more efficient than waiting for repairs.